
Fighting zone – red zone
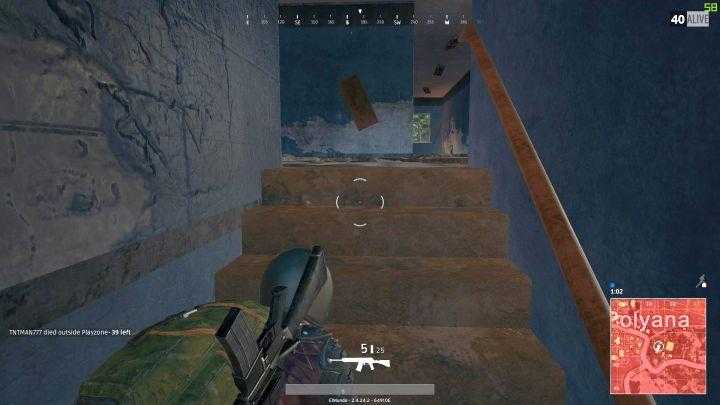
Apart from the white and blue zones described in the previous chapter, (“Fighting zones – white and blue zones”) there is one more zone – the red one. This one differs from the previous ones. The red zone appears randomly, every several dozen seconds, and covers a small area. Shortly after it appears, the entire red zone will be bombarded. The missiles can destroy any vehicle or kill a player if he/she remains within their range. Thus, you need to pay attention what happens around your character. The mini-map should help you with that – use it to find out if your character ended up within a red zone. If the mini-map turns red, you are in the danger zone.
Some interesting facts about the red zone:
- Once it appears, a player has a few seconds before the zone gets bombarded.
- Red zones don’t move – it will not change its position, as the blue one would.
- There cannot be more than one red zone at a time. It can appear in only one place, and once the bombardment is over, a new one will appear after several seconds.
- Red zones can appear anywhere, even outside a white zone and far away from any players.
- A single bomb will always kill a character and can destroy any vehicle.
- A Character inside a building is safe but he cannot stand by a door or look through a window.
- Remaining inside a red zone during the bombardment does not mean instant death. Bombs land randomly, and thus it is possible to survive the strike. Still, it’s better to keep away from danger by moving outside of the zone or hiding in a building.
Supply airdrop
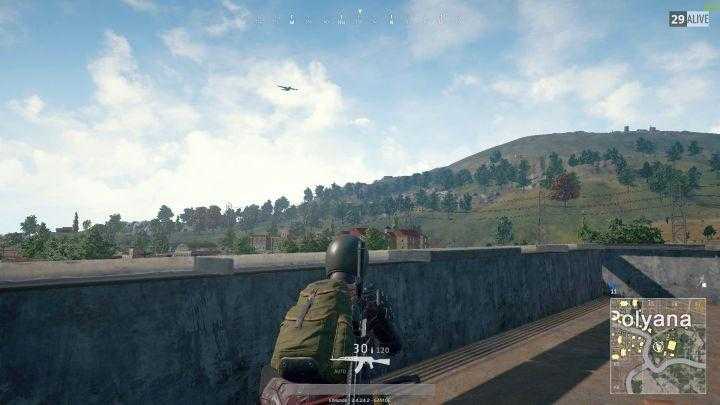
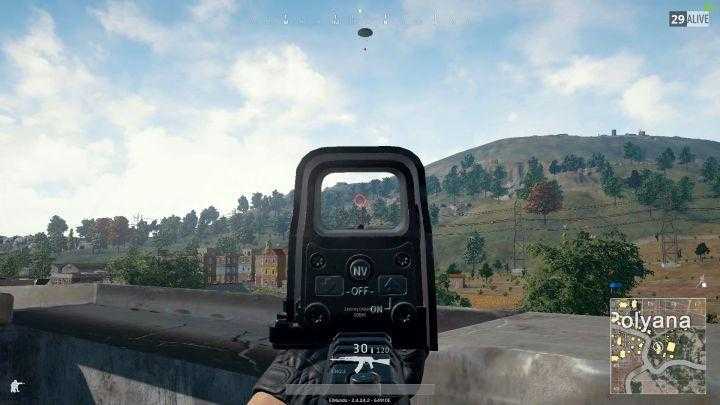
Few minutes after the match starts (when all the players get on the plane), crates with supplies will begin to fall from the sky. A plane will appear every several dozen seconds and drop the supplies in a random location. When it hits the ground, you can open it and collect useful (and often not available anywhere else) items. Inside the crates, you can find:
- Weapons: M249, Tommy Gun, AWM, M24, Mk14 EBR, OTs-14 and Kar98k;
- Gear: helmets, armor and level 3 backpacks;
- Consumable items: Adrenaline Syringe and Medical Kit;
- Weapon modifiers: 4x, 8x and 15x scopes, silencers for your assault and sniper rifles;
- Ghillie Suit.
Some of these items can only be found inside supply crates. For instance: M249, Tommy Gun, AWM, M24, Mk14 EBR, OTs-14, Adrenaline Syringe, x15 scope and Ghillie Suit.
It doesn’t take a scientist to know that supplies will lure all the nearby players. If you want to investigate the site and collect useful items, you should remember about several important things:
1. The supply crates are well visible (and hearable) for most players on the map. Furthermore, it takes time before the crate actually reaches the ground, so most of your enemies will surely reach the site. The entire surrounding area turns into a battlefield.
2. Pay attention to the distance between you and the crate. If you are nearby and there aren’t any enemies around, you should try to get the supplies. Some of them (such as powerful sniper rifles, Ghillie Suit or the x15 scope) can make your life much easier. However, if you are located far away from the crate, just let it go.
3. If you are playing alone, you need to watch your back. However, if you are a part of a team, it’s wise to send one of the players to collect the content, and the rest should cover his/her position.
4. If you have a vehicle, you should use it to create a provisional cover that can save you from hostile fire. This way, your character will be covered from two directions – by the vehicle and the very crate.
5. During the final stage of the match, when there are only 10-15 players left, it’s best to leave these crates alone. You may not need the items anymore and moving too close to the site may get you killed.
6. Even if you are not planning to collect the supplies, it’s worth going near the airdrop area. Surely, at least several players will go there – use this opportunity to deal with them. It’s especially easy when you have a fine assault rifle or a sniper rifle, and you can hide in a safe place.
Sense of direction and moving across the map
Collecting items, shooting and avoiding conflict when it is not necessary is one thing by the map is also very important in Playerunknown’s Battlegrounds. Knowledge of certain parts of the map, places where weapons and/or vehicles can be found, and places that you should keep away from is key to success. Without proper knowledge and planning, you won’t be able to get weapons and useful items fast enough. Details concerning places that one should investigate or keep away from, were provided in chapter “Map”. Here we shall focus on how to move around and read the map.

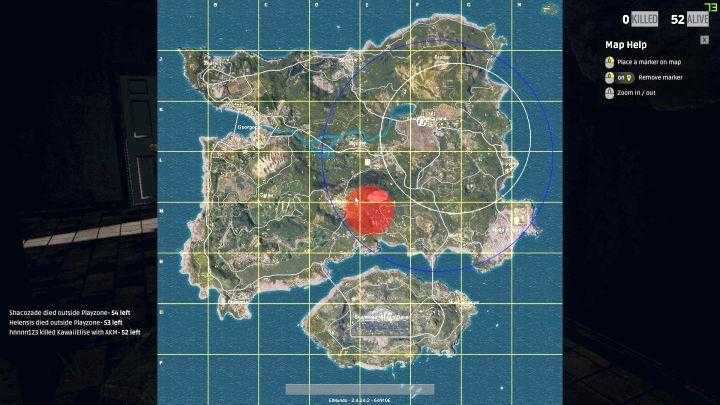
There are two ways to check the map – you can check the mini-map, which represents the area surrounding your character, or open the world map with “M” button. The mini-map is also useful for monitoring if the player moved away from the white/blue zone or ended up in the red one. The world map will let you plan your next move and predict how the white zone will change.

The world map consists of 64 parts, separated by yellow lines. Each part covers 1km2 (1000 meters x 1000 meters). Furthermore, each part is divided into 100 smaller zones (10 x 10) – they are 100 meter long and wide. This knowledge will let you predict how far a target presented on the world map is located, and how long it will take to get there. You can also calculate how long it will take to reach the nearest white zone and avoid the blue one at the same time. It takes time to master the map, thus you shouldn’t overuse the map if you are just starting your adventure with Playerunknown’s Battlegrounds.
You should also remember that once you jump out of the plane, your character is able to fly for 1 kilometer, before the parachute opens. This covers one yellow square on your map. In order to do that, place your camera up (opposite to nosediving). This will let you reach places that are not located along the plane’s route, and areas where you can find valuable items and/or vehicles. It’s also less likely that you will come across another player.
Each character in the game starts with 100 points of (or 100%) health. During the game, every player is sure to take greater, or lesser, damage (or die immediately from a gunshot wound), which decreases the health bar.

Obviously, reaching 0 HP (0%) ends in the player’s death, when he is returned to the main menu. This requires you to heal your wounds on a regular basis and keep your character alive for as long as possible.
You can use various healing items and boosters to attain this. In the game, there are 6 such items – 3 healing and 3 boosters. These are:
- Bandage – regenerate 10 HP within 3 seconds, they require 4 seconds to administer. Bandages can replenish up to 75 HP, they cannot be used afterwards.
- First Aid Kit – replenishes the character’s HP up to the level of 75, require 6 seconds to administer. Just like bandages, they cannot heal beyond the level of 75 HP.
- Medkit – after 8 it requires to administer, it replenishes HP to the maximum possible level (100), regardless of the number of points before administering.
- Energy Drink – a booster, which provides 40 boost points. Thanks to this, your health regenerates slowly over time and it can heal maximum amount of HP.
- Painkillers – an upgraded version of the above, which provides 60 boost points. Apart from replenishing health, it can also provide a small bonus to speed of movement.
- Adrenaline Syringe – an adrenaline shot that provides 100 boost points and fills up the entire boost bar. Thanks to this, the character regenerates health and receives a bonus to speed of movement.
As you can see, each of the items provides a different value, which is why they are best used in different situations to achieve best effects. Keep the following in mind, while using the said items:
- If your character has taken damage and there is no enemy around that would jump you, use bandages to heal. This takes longer, but will save you some other, more potent items.
- If you require immediate healing, use First Aid Kit or Medkit for immediate replenishment of 75 or 100 HP, respectively, without the necessity to use several bandages. This comes in handy, when you cannot spare time for lengthy healing – while under enemy fire, or when the blue zone is on your back.
- If your character has 40-50 HP, there is no point in using anything else than bandages – the effectiveness of First Aid Kit will be wasted (because it will only heal 25 HP, measly 15 more than in the case of bandages) and it is better to save Medkit for pressing situations, when your HP drops to critical level (around 20).
- Use boosters after you heal your character with bandages and First Aid Kit – thanks to this you will regenerate 75 HP to the full amount quickly.
- In the final minutes of the game, when there are few players left (10-15) and the battlefield has shrunk considerably, try to retain the boost effect with boosters. This will ensure constant regeneration of health to your character and, if the boost bar exceeds 60%, it also provides a small bonus to speed of movement.
Reducing damage
Playerunknown’s Battlegrounds provides quite a realistic reproduction of battlefield conditions – the trajectory of bullets is curved, falling from a greater height ends with loss of health (or in death), just like collision with a speeding car does. The same goes for damage taken from enemy fire – in majority of cases, you only have to be hit by 3-4 bullets to lose your entire health bar and end the game. For this reason, it is best to invest into buying items that decrease damage taken. Here, you can buy bulletproof vests and helmets.

Vests ensure protection against bullets fired into the chest and they provide a small bonus to backpack’s volume (number of items that you can carry). These have been divided into three tiers:
- Police Vest Level 1 – absorbs 30% of damage, increases character’s payload by 50 points and has 200 points of durability.
- Police Vest Level 2 – absorbs 40% of damage, increases character’s payload by 50 points and has 220 points of durability.
- Military Vest – absorbs 55% of damage, increases character’s payload by 50 points and has 250 points of durability.
Helmets, on the other hand, protect your head from enemy fire, but they do not affect your payload. They also have been divided into three tiers:
- Motorcycle Helmet – absorbs 30% of damage and has 80 points of durability. It protects the head, but not the face – taking a hit into face still deals 200% damage.
- Military Helmet – absorbs 40% of damage and has 150 points of durability. Just like the Motorcycle Helmet, it protects the head, but not the face.
- Spetsznaz Helmet – absorbs 55% of damage and has 230 points of durability. It is the only helmet to provide protection to the face and absorbs 55% damage to the face.
Finally, there are a few things that should be remembered about these items:
- It is a good idea to pick up any of the types of the items, if you do not wear any protection. You can later on replace them with higher tier items.
- It is better to replace the items, if their durability drops below 40-50 points, because they cease to provide protection after 1-2 more hits. It is better to replace tier 3 vest with the one of tier 2, if there is 20 points of durability left in the one that you are currently wearing. The only exception here is the helmet. It is better to wear a tier 3 helmet with 10 points of durability, because it is the only one to protect the face.
- Vests and helmets with as little as 1 durability still provide the same percentage bonus to damage absorption – the only difference is that they will be useless after a single enemy attack.
- These items do not provide any protection against falls from heights.
- Cosmetic items worn on the face, such as Ballistic Mask or Gas Mask do not provide any protection.
- Frying pan carried on the back provides protection from damage into that region – it deflects any type of projectiles, even shotgun buckshots, and absorbs damage.
White and blue zones on your map
After several dozen seconds, a white circle will appear on your map. Your task is to reach that area before the time runs out. When it does, another zone (blue) will appear on your map, and it will move towards the white one. Staying outside the white zone has no consequences. However, players outside the blue zone will take damage. At first, the damage will be rather small and it will be possible to run through a zone if you use a medkit. Unfortunately, as the circle begins to shrink, the damage will increase significantly. Thus, it’s important to stand by the white zone when the time runs out. Each time the blue circle reaches the white one, a new timer will start and a new white zone will appear on your map. The fact that the zone will become smaller and smaller, means that the players will fight closer to each other – get ready to fire!
Don’t throw yourself deep into the zone. It’s best to hide for the first several dozen seconds and check the area for any players. Move towards the center of the zone 20-30 seconds before the countdown is over – it’s enough, and other players won’t have too much time to fire at you. To sum up:
1. Staying outside the white zone has no consequences. However, players outside the blue zone will take damage.
2. Try to stick to the edge of the white zone, not the very middle – it’s easier to defend yourself there.
3. If you are lucky enough and you end up in the middle of the first white zone, take shelter in one of the buildings, and wait for other players. Pay attention to the zone status and use this time to hunt down other players.
4. If a bridge separates you from the white zone, you should use one of the nearby boats – reach the zone via water, and not the very bridge. Bridges can be used to set up an ambush, so do whatever you can to avoid it. Even if it means swimming across the water and climbing the rocks.
Some of the contents are from the internet, if these contents infringe on your copyrights, please contact me. All contents doesn't represent my points.